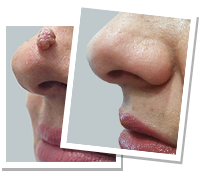
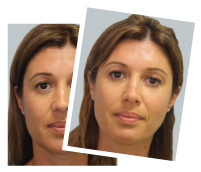
Before and after photographs
Before and after images are the most persuasive thing a cosmetic clinic can show, and the easiest thing to mislead with. This page explains how ours are taken, what the rules require, and how to read anyone’s — including ours.
What the rules require
Under AHPRA’s advertising guidelines for regulated health services, before and after images must:
- Be of actual patients of the practice — not stock photography, not manufacturer images, not someone else’s cases
- Be taken under consistent conditions — same lighting, same angle, same distance, same pose, same background, no make-up in one and not the other
- Be unaltered beyond standard cropping and resizing — no smoothing, no retouching, no filters
- State the time elapsed between the images
- Carry a clear statement that results vary between individuals
- Be used with the patient’s informed, documented consent, which the patient can withdraw
- Not be presented in a way that creates an unreasonable expectation of benefit
Images must also not be used as a testimonial — a patient’s account of their treatment is a testimonial, and testimonials about regulated health services are prohibited in advertising.
Why skin photographs are the easiest of all to manipulate
Every before-and-after image can be shaded by how it is taken. Skin images are a special case, and it is worth understanding why before you look at anybody’s gallery.
A change in contour — a jawline, an abdomen, a nose — is geometry. Move the camera and you change it, but it is still a shape, and a shape is hard to invent. Pigmentation, redness and texture are not shapes. They are almost entirely a function of how light falls on the skin, which means they can be made to appear or disappear without touching the patient at all.
- Texture and fine lines live in shadow. Light coming from the side rakes across the skin and throws a shadow into every depression, so pores, scars and creases become visible. The same skin lit flat and frontally — ring light, on-camera flash — loses almost all of that shadow. A “before” shot in side light and an “after” shot in flat light will show a dramatic improvement in someone who has had no treatment whatsoever.
- Redness and pigment shift with white balance. A warmer setting mutes redness; a cooler one lifts brown pigment out of the skin. Neither is retouching, and neither is visible to a reader.
- Exposure alone can remove pigment. Brightening an image by a stop washes light brown marks towards the surrounding skin tone. Nothing has been edited; the camera was simply set differently.
- Phone cameras process faces automatically. Modern phones apply smoothing and tone mapping to anything they recognise as a face, often by default, and the processing is heavier in poor light. A phone photograph of skin is already an interpretation before anyone edits it.
This is the reason the rule about consistent conditions matters more for skin than for anything else — and the reason a pair of skin images with no information about how they were taken tells you nothing at all.
What we show
Before and after photographs of our own patients are shown in consultation, where we can select cases relevant to your skin, your concern and your skin type, and discuss honestly what did and did not change.
That is deliberate rather than evasive. A gallery on a website is chosen to impress; a case shown in consultation can be chosen to inform — including cases where the result was partial, or where the person needed more sessions than they expected.
Ask to see comparable cases at your consultation. Ask specifically for someone with your skin type and your degree of the problem, not the best result on file.
How to read any before and after image
These apply to every clinic’s images, ours included:
- Lighting. Flat, even lighting in the “before” and softer, more diffuse lighting in the “after” can make pigmentation, texture and lines look dramatically improved with no treatment at all.
- Angle and distance. Small changes alter apparent contour considerably.
- Expression and pose. A relaxed face photographs very differently from a tense one.
- Make-up. A bare “before” against a made-up “after” is not a comparison.
- Time elapsed. An “after” taken at peak swelling, or one taken years later with other treatments in between, tells you something different from one at a stated interval.
- What else was done. Many results combine treatments. If an image is labelled with one treatment, ask whether anything else was involved.
- Sample selection. Any gallery shows the best cases. That is not dishonest, but it is not representative either.
If images carry a note like “not our patients”, they are illustrations of a technique, not evidence of what this clinic achieves.
A quick check anyone can do
Look at something in the photograph that treatment could not have changed — an eyebrow hair, the edge of a nostril, the catchlight in the eye, the shadow under the jaw. If those look different between the two images, the lighting or the camera changed, and so does the value of the comparison. Consistent conditions show up in the parts of the picture nobody was thinking about.
How to photograph your own skin across a course
This is the most useful thing on this page, because skin treatment changes things slowly and you see your own face every day. People routinely conclude a course did nothing, and are then surprised by a side-by-side. Your own photographs, taken properly, are the only honest record you will have.
- Take the baseline before the first session, even if you feel silly. There is no way to recreate it later.
- Turn off every filter and beauty mode first. They are on by default on many phones and they remove precisely the texture and tone being assessed. This is the single most common problem with patient photographs.
- One window, daylight, facing it. Stand facing a window with the light on your face, not behind you and not under a ceiling downlight. Overcast daylight is the most repeatable light there is.
- Mark the spot. Same room, same window, same distance, same time of day. If you can, note where you stood — a tile, a floorboard.
- Three angles every time: straight on, and forty-five degrees to each side. Pigment and texture hide at some angles and appear at others, so a single front-on shot will mislead you either way.
- No make-up, relaxed face, hair back. A tense face and a relaxed face are different photographs.
- Do not move closer — step back and let the camera do the work if you need a close view. Moving the phone close distorts everything it sees.
- Repeat before each session and at the end. Compare first to last, not last to the week before.
Bring them to your review. A photograph you took under consistent conditions is better evidence than either of us remembering.
What photographs well, and what does not
Worth knowing before you judge a result, because some genuine improvements are almost impossible to capture.
| Concern | How it photographs |
|---|---|
| Brown pigment, age spots, freckles | Well. Discrete marks against surrounding skin are the clearest thing to compare, and are what most galleries lean on. |
| Redness and visible vessels | Variably. Strongly affected by white balance, room temperature, and whether you have just walked in from outside. |
| Texture, pores, fine lines | Badly, and unfairly in both directions. Entirely dependent on the angle of the light. |
| Depressed scarring | The hardest. It is contour, so it exists only as shadow — the same scars can look severe or nearly invisible in two honest photographs taken minutes apart. |
| Overall skin quality | Poorly. Brightness, clarity and how skin feels are real changes that a photograph flattens. |
If your concern is in the lower half of that table, expect your own assessment in the mirror to matter more than any image, and expect a clinic’s gallery to be weighted towards the concerns at the top.
What a proper clinical photography setup looks like
Reasonable to ask about, and reasonable to expect:
- The same camera and the same settings each time, not whatever phone is nearest
- A fixed, plain background — and the same one
- Controlled lighting that does not change with the weather or the time of day
- A marked position on the floor so distance and angle repeat
- A standard set of views, taken every time, not only the flattering one
- No make-up in any clinical photograph
- Images stored as part of your medical record, with consent recorded separately for any use beyond your own file
Consent to be photographed for your record is not consent to be shown to anyone else. Those are two different decisions and you can say yes to one and no to the other. You can also withdraw consent for use later, and you do not have to give a reason.
What results to expect from skin treatment
Realistically, across the skin services on this site:
- Most skin treatments produce improvement, not transformation
- Most work over a course of sessions, with results building over months as collagen remodels
- Most need maintenance, because the causes — sun, ageing, genetics, hormones — continue
- Results vary substantially with skin type, age, the cause and severity of the concern, and how consistently the plan is followed
Your practitioner should tell you what degree of change is reasonable in your case before you commit, and should tell you if the answer is “less than you are hoping for”.
Questions worth asking
- Can I see cases with my skin type and my level of this concern?
- How long after treatment were these taken, and how many sessions did it take?
- Was anything else done to this person at the same time?
- Can you show me a case that did not go as well as hoped?
- What would you expect for me specifically?
- What does the whole course cost, and what does maintenance cost after that?
- How are your photographs taken — same camera, same light, same position?
- Will my photographs be part of my record only, unless I separately agree otherwise?
What we do not do
- We do not publish a before-and-after gallery on this site. Cases are shown in consultation, matched to you.
- We do not use stock, manufacturer or someone else’s images as if they were our results.
- We do not retouch, smooth or filter clinical photographs. Cropping and resizing only.
- We do not publish patient accounts of treatment. Testimonials about regulated health services are prohibited, and their absence from this site is compliance, not a gap. See patient stories.
- We do not make your consent to be photographed a condition of treatment for your own record beyond what good practice requires, and consent to any wider use is always separate and always withdrawable.
Risks
Every skin treatment carries risks, which differ by treatment and skin type — redness, swelling, blistering, changes in pigmentation that can persist, scarring, infection, incomplete response and the need for repeat treatment. Darker skin types carry a higher risk of pigment change with light-based and ablative treatments.
See risks of cosmetic treatments.
Booking a consultation
Me Clinic, 4 Burke Road, Malvern East VIC 3145. Phone 1300 852 050 or (03) 9569 3511, or use the online consultation form. As at September 2024 and including GST, a skin assessment is $50 and a Cosmetic Doctor consultation is $150.
Related: skin conditions, skin treatments, all skin services.
Common questions about before and after photographs
What do the advertising rules require of before and after images?
They must be of actual patients of the practice, taken under consistent conditions, unaltered beyond cropping and resizing, labelled with the time elapsed, accompanied by a statement that results vary, used with documented consent that can be withdrawn, and not presented so as to create an unreasonable expectation of benefit.
Can a clinic publish a patient’s account of their treatment?
No. A patient’s account of a regulated health service is a testimonial, and testimonials in advertising are prohibited.
Why are skin photographs easier to manipulate than others?
Because pigmentation, redness and texture are not shapes — they are almost entirely a function of how light falls on the skin. Contour is geometry and is hard to invent; tone and texture can be made to appear or disappear without touching the patient.
How does lighting change texture?
Light from the side rakes across the skin and throws a shadow into every depression, so pores, scars and creases show. Flat frontal light removes almost all of that shadow. A side-lit before and a flat-lit after shows dramatic improvement in someone who has had no treatment.
Can pigment be removed without editing?
Effectively yes. Brightening the exposure washes light brown marks toward the surrounding tone, and white balance shifts how brown and red read. Nothing has been retouched; the camera was set differently.
Do phone cameras alter skin?
Yes. Modern phones apply smoothing and tone mapping to anything they recognise as a face, often by default, and more heavily in poor light. A phone photograph of skin is an interpretation before anyone edits it.
Is there a quick way to check a pair of images?
Look at something treatment could not have changed — an eyebrow hair, the edge of a nostril, the catchlight in the eye. If those differ between the images, the lighting or camera changed, and so does the value of the comparison.
Why does Me Clinic not publish a gallery?
Because a gallery on a website is chosen to impress, while a case shown in consultation can be chosen to inform — including cases where the result was partial or needed more sessions than expected.
What should I ask to see at my consultation?
Comparable cases: someone with your skin type and your degree of the problem, not the best result on file. It is also fair to ask to see a case that did not go as well as hoped.
Should I photograph my own skin?
Yes, and take the baseline before the first session — there is no way to recreate it later. Skin treatment changes things slowly and you see your own face daily, so your own record is often the only honest comparison you will have.
What is the most common mistake in patient photographs?
Leaving filters and beauty modes on. They are on by default on many phones and remove exactly the texture and tone being assessed.
What light should I use?
Daylight, facing a window, with the light on your face — not behind you and not under a ceiling downlight. Overcast daylight is the most repeatable light there is.
How many angles?
Three every time: straight on and forty-five degrees to each side. Pigment and texture hide at some angles and appear at others, so a single front-on shot will mislead you in one direction or the other.
Should I move the phone closer for detail?
No. Step back and zoom. Bringing a phone close distorts everything it sees.
Which concerns photograph well?
Brown pigment, age spots and freckles photograph clearly, which is why galleries lean on them. Redness is variable. Texture, pores and fine lines photograph badly and unfairly in both directions, and depressed scarring is the hardest of all because it exists only as shadow.
What if my concern is one that photographs badly?
Expect your own assessment in the mirror to matter more than any image, and expect any clinic’s gallery to be weighted toward the concerns that photograph well.
What should a clinic’s photography setup look like?
The same camera and settings each time, a fixed plain background, controlled lighting, a marked floor position so distance and angle repeat, a standard set of views taken every time, no make-up, and images stored as part of your medical record.
Is consenting to photographs the same as consenting to their use?
No. Consent to be photographed for your record and consent to any wider use are two separate decisions. You can agree to one and refuse the other, and you can withdraw consent later without giving a reason.
What results should I expect from skin treatment generally?
Improvement rather than transformation, over a course of sessions, with results building over months and needing maintenance afterwards because the underlying causes continue.
What should my practitioner tell me before I commit?
What degree of change is reasonable in your case — including if the honest answer is less than you are hoping for.
What are the risks of skin treatment?
They differ by treatment and skin type, and include redness, swelling, blistering, pigment changes that can persist, scarring, infection, incomplete response and the need for repeat treatment. Darker skin types carry a higher risk of pigment change with light-based and ablative treatments.
Individual results may vary. Any surgical or invasive procedure carries risks. Before proceeding you should seek a second opinion from an appropriately qualified health practitioner.
Images on This Page
-
https://www.meclinic.com.au/wp-content/uploads/2024/03/meclinic-logo.png
Me Clinic
-
https://www.meclinic.com.au/wp-content/uploads/2022/02/call.png
call
-
https://www.meclinic.com.au/wp-content/uploads/2022/03/cs1-skincondition-case-study1-200x171-1.jpg
(no alt text)
-
https://www.meclinic.com.au/wp-content/uploads/2022/03/cs5-Before_Post_MOLE-200x171_VK.png
(no alt text)
-
https://www.meclinic.com.au/wp-content/uploads/2022/03/cs7-combo-laser-botox-200x171_nosethread-casestudy1-200x171-1.png
(no alt text)
-
https://www.meclinic.com.au/wp-content/uploads/2022/03/cs1-anti-wrinkle-200x171-1.png
(no alt text)
-
https://www.meclinic.com.au/wp-content/uploads/2022/03/cs1-dermal-fillers-200x171-05.png
(no alt text)
-
https://www.meclinic.com.au/wp-content/uploads/2024/02/acps.png
(no alt text)
-
https://www.meclinic.com.au/wp-content/uploads/2024/02/racs.png
(no alt text)
-
https://www.meclinic.com.au/wp-content/uploads/2024/02/fracs.png
(no alt text)
-
https://www.meclinic.com.au/wp-content/uploads/2024/02/isaps.png
(no alt text)
-
https://www.meclinic.com.au/wp-content/uploads/2024/02/cpca.png
(no alt text)
-
https://www.meclinic.com.au/wp-content/uploads/2022/02/auscop.png
(no alt text)
-
https://www.meclinic.com.au/wp-content/uploads/2022/02/amav.png
(no alt text)
-
https://www.meclinic.com.au/wp-content/uploads/2022/03/channel7.png
(no alt text)
-
https://www.meclinic.com.au/wp-content/uploads/2022/03/channel9.png
(no alt text)
-
https://www.meclinic.com.au/wp-content/uploads/2022/03/channel10.png
(no alt text)
-
https://www.meclinic.com.au/wp-content/uploads/2022/03/abc.png
(no alt text)
-
https://www.meclinic.com.au/wp-content/uploads/2022/02/malvern-map-thumb.jpg
(no alt text)
-
https://www.meclinic.com.au/wp-content/uploads/2022/03/home-conctact-tab.jpg
(no alt text)
-
https://bat.bing.com/action/0?ti=56339805&Ver=2&mid=78a6cb53-d85e-4334-93d3-1148b2a91d8d&bo=1&sid=b20f6fb0ac3811f1b3b9151d19c03a82&vid=b20fa910ac3811f1b75739a71f4ef8c1&vids=1&msclkid=N&pi=918639831&lg=en-US&sw=1280&sh=720&sc=24&tl=Before%20and%20After%20Skin%20Conditions%20-%20Real%20Success%20Stories&p=https%3A%2F%2Fwww.meclinic.com.au%2Fskin%2Fskin-conditions%2Fbefore-and-after%2F&r=<=3765&evt=pageLoad&sv=2&cdb=AQAQ&rn=63647
(no alt text)